How do you create a poster with Canva?
- Ion Sravan
- May 21, 2023
- Uncategorized
- 0 Comments
How do you create a poster with Canva?
Designing Visual Media
Considering the importance of visual marketing and the necessity of integrating accessible imagery in blog articles and developing customised, effective visual media for Pinterest, Linkedin, Twitter, Instagram, and Facebook postings consistently is easier said than done. It’s time-consuming and necessitates the use of several tools. Not if you use Canva.
Canva integrates all of the essential editing and publishing tools, as well as a large image bank, in a single online design platform. In addition Canva integrates all of the essential editing and publishing tools, as well as a large image bank, in a single online design platform.
Be it for your Instagram, Pinterest or any other platform that requires visual content, Canva has numerous templates for each type of content. In this article, we will take you through a step by step guide to create a poster on Canva.
Ready to design a poster?
Great! Let’s dive right in!
Step 1 – Click the ‘create a design’ button.
Go to your account dashboard and click the Create a Design button in the upper right corner of the screen.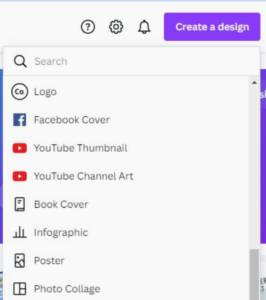
A dropdown menu with numerous options will display. Choose the poster for your design.
When it comes to making posters, you have two choices: portrait or landscape. Portrait posters are the default setting.
Step- 2 Selecting a Template
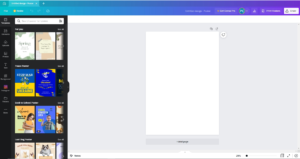
The design tab appears when you pick the kind of design.
This is the appearance of the design tab. You may design a poster from scratch or choose a template and tweak it according to your needs. In this section, we will create a poster to raise awareness about global warming. We’ll begin by choosing an appropriate template. To discover the template, we will use the toolbar to search for global templates and choose the one that we believe is most relevant.
Step – 3 Add or remove elements, pictures, and typefaces
Here’s everything you can do after you’ve chosen a template. Change the fonts or add a new font group. Modify and add relevant content to the existing texts. Replace old elements with new ones. Adjust, trim, and apply effects and filters to your design.
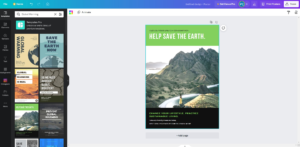
Step – 4 Remove or replace the existing image with a new one.
Replace or remove the current image. We are not replacing it because it is a suitable match for global warming. Search the keywords on the toolbar in the images tab to get the precise image you’re looking for. Choose the best one and put it to use.
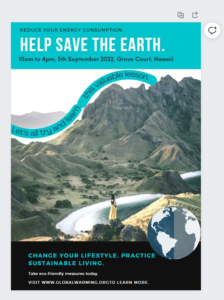
Step – 5 Change the background colour
We want our design to be distinct and one-of-a-kind. As a result, we modified the background colour from green to blue. To do so, click on the background once to see several modifying choices emerge on the formatting bar. To see a dropdown list of colour palettes, click the colour window. Choose the one that best matches your design.
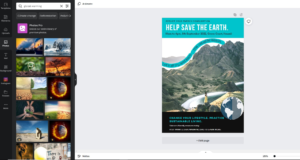
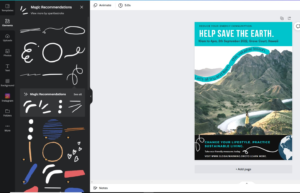
Step – 6 Include additional elements in your design.
Because the poster appears to be bland and boring, we will incorporate attractive details to make the design more appealing. 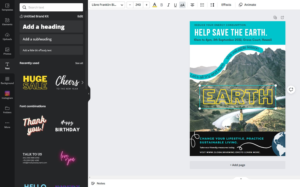
Using the toolbar, look for the most relevant element. You may also alter its colour, resize it, or flip it by selecting it.
Step – 7 Modify the typefaces and add new content.
We can add and remove typefaces to suit the needs. We will provide the details such as mail id and contact numbers for enquiring on the event. Make sure to add engaging content in order to have a good impact on the viewers.
From the text tab, you may add various sorts of bundled texts or browse for existing typefaces. If you have Canva’s premium membership, you can even upload and use your own fonts.
Step – 8 Make adjustments to the different elements of your design.
To finalise the design, we will make adjustments to the various typefaces and components that we have included. There are no rules for this, and you can arrange them anyway you see right.

Simply ensure that the parts of your design are proportional and complementary to each other. To move a design element, typeface, or picture forward or backward, pick it and left click to access a menu of alternatives. Choose the most appropriate choice from this list.
Step – 9 Download your design
Once you’ve generated an appealing design, save it to your local files for future use. In general, all of your creations are immediately stored in Canva’s local cloud storage. You may modify, download, or use them whenever you want from your account.

To save your design to a local file, click download, pick the file type, and then select the download option from the list.
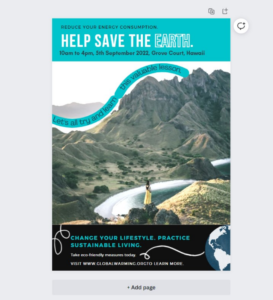
The Design

This is the design of our campaign poster.
Despite the steps we’ve discussed here, Canva has a plethora of more designs and tools to explore. In addition to advertising images like the one we used for the animal sanctuary, you can make slideshows, brochures, newsletters, and even more.
When are you designing a visual media?
For more information, contact App Development Company.
Related Posts

- Ion Sravan
- May 12, 2023
The Future of App Development in Rajahmundry: Trends to Watch Out For
The Future of App Development in Rajahmundry: Trends to Watch Out For Rajahmundry is a rapidly ..

- Ion Sravan
- June 8, 2023
TOP APPS FROM AP & TELANGANA
TOP APPS FROM AP & TELANGANA India stands third among the global nations’ share of Billi ..


